Monday, April 5, 2010

魚料理 ぎんだら - Gindara - Alaskan Black Cod

こんにちわ! Your Gaijin Gourmet is back with another oh so おいいしい dish you will absolutely love! Today we introduce you to Gindara which is actually Alaskan Black Cod that we will prepare in foil and bake in the oven. This is another easy dish to prepare and a favorite of many of my Japanese friends. Black Cod is mostly harvested by the Boys of the Bearing Sea and a good portion of it gets shipped to Japan for consumption. Luckily for us, some of that cod makes it’s way down to the lower 48 and can be found in most American Markets. So aside from ease in preparation, the ease in acquisition of ingredients makes Gindara an excellent meal for us to feature here.

So let’s get started はじめましょお!
4 Block Cod Fillets - I say buy four because you will kick yourself in the butt if you only buy two. Trust me!
1 pkg Baby Spinach
1 Lemon
2 tblsp Mayonnaise
Salt & Pepper
Vegetable Oil
Tin Foil
1 Oven - なんちゃって! - Just kidding! No seriously, you'll use one.

The first thing you will want to do is start with the preparation. So in starting, take a good sized piece of tin foil large enough to completely encase your fillet. Fold your edges neatly as if you were going to place a square object inside. Do not approach this like a baked potato. Remember, presentation is very important. You’ll see why when we move over to the spinach.
Once you have your foil laid out, take a small amount of vegetable oil (or olive oil) and lightly baste the foil.
You can use a small brush to evenly prep your foil.

Now that your foil if prepped, you will now prepare the baby spinach.


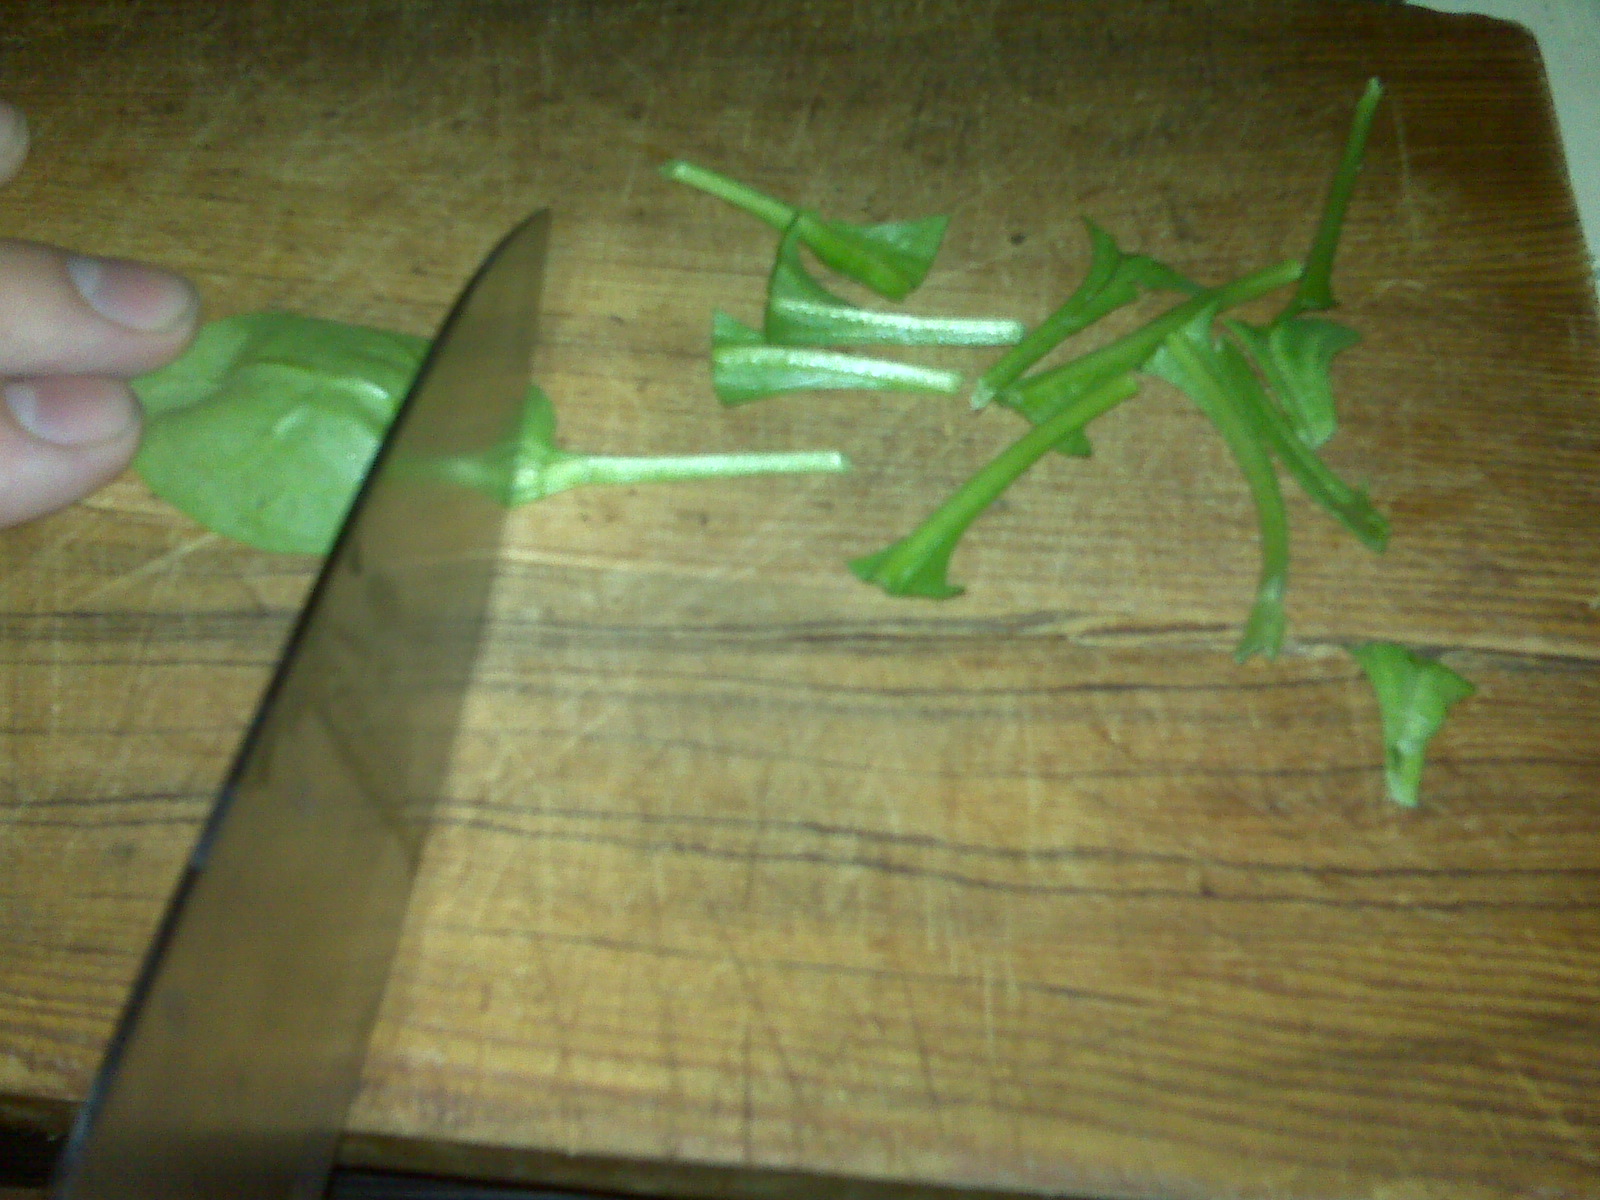
Cut your spinach leaves in one inch lengths.


Place your spinach leaves inside the foil in a neat manner.


Place your black cod fillets on top of the spinach.

Lightly add salt & pepper.

Next, slice your Lemon in two. Use one half of the lemon and squeeze over the fillets.

You’ll use the other half later for garnish.

Take two tablespoons of mayonnaise and spread lightly over your fillets. For presentation purposes, it's recommended you use a squeezable bottle.

For personal taste I will also recomend using Japanese Kewpie Mayonnaise. It really adds to the taste! YUM!


Once you have made it this far, you can preheat your oven and fold over your tin foil. Ok, now this looks like you are baking a potato but trust me, this is going to come out seriously yummy!

Bring your oven up to 350* and bake for 15-20 minutes. Take a peak at 15 minutes and if your oven is like mine, you'll likely put your fillets back in for another five minutes. Always check to be sure.

Once your fillets are cooked, take your remaining lemon half and cut into thin slices for garnish and serve.

You'll discover the bed of spinach will have cooked nicely under your fillets. If your fillets have bones, don't fret. When properly cooked, the bones will lift nicely. Your end result should be phenominal. The Gindara literally melts in your mouth leaving you saying おいいしい!!!

Gindara is a popular fish dish in Japan and here in our home. It's both inexpensive and easy to make within thirty minutes. We think you will love this dish. We sure did! Let us know how yours came out!

Enjoy!

丼ずけ-どん - Zuke-don

こんにちわ! I’ve been getting some positive feedback on some of my posts and every so often I’ll get a request to offer something basic that anyone with the least amount of cooking experience can make. Well to satisfy that request, we tried our hands at another Donburi using Tuna. For this Donburi you can use any sashimi grade Tuna but for this we are going to go native and use Hon Maguro (blue fin). Now if you have been reading the Japanese News lately, you have seen a lot of controversy over the use of blue fin tuna. I personally don’t have an issue with it for if it were so endangered I wouldn’t be able to find it so easily at the Japanese Markets here in Southern California. But if that is an issue for you I’ll repeat that you can always use any sashimi grade tuna as a substitute. We sure won’t object!


So here’s what you will need:
I pkg Hon Maguro – Tuna – Sashimi Grade
Japanese Soy Sauce
1 Cup of cooked Sushi Rice
Wasabi – according to taste!

If you are ready, let’s begin! はじめましょ!

To start we will first open our package of tuna. In Japanese markets you can get this pre-sliced but if this is not an option, no problem! Simply slice your tuna filet into bite sized one inch slices.

The next thing you will want to do is marinate your tuna in soy sauce as shown below. Refrigerate for one hour then turn over your tuna and refrigerate for another two hours.  Sounds simple so far? It is!


There's no need to drown the tuna. Simply pour enough soy sauce to around 1/4 inch to effectively marinate.

After one hour, turn your tuna and re-refrigerate for another two hours as seen here.
If you have read our previous post on how to make sushi rice and have already have your rice ready to go, simply fill enough rice in a bowl and leave enough room for your tuna. Serve your marinated tuna over the rice. For me I like to mix my rice up but that is your choice just as you can choose to spice it up with a dash of wasabi in your soy sauce. In any case, you’ll wind up with a savory dish full of nutritional value such as omega-3, iron, potassium, & vitamin b6 proteins you’ll enjoy on a hot summer’s day or anytime of the year.

If you are looking to cut calories, we suggest using a low sodium light soy sauce as we use. You can also substitute your sushi rice with brown rice. We’ve tried to make Zuke-don both ways and it came out おいいしい!!!

So once again, the Gaijin-Gourmet has brought you another simple easy to make dish you can make whether you are here in the U.S. or in Japan and with little or no trouble at all.

Enjoy!

Thursday, April 1, 2010

もち米 Sushi Rice Basics

こんにちわ! The Gaijin Gourmet is back with another how to for you! Every now and then I will find myself talking about making Japanese dishes when someone stops me in mid sentence going ちょっと まって ください (whoa-wait)! "how do you make Japanese sticky rice???" I say to them not to feel embarrassed if you didn’t already know how. (I sure didn’t learn over night until I was shown how to properly make it myself). It’s a fair and most basic question to ask and so I felt it was about time I covered this most basic and essential component to Japanese Cooking.

So let’s get to it! はじめましょう!


The first thing you’ll need of course is some good quality short grained rice. Your choice of rice is an important factor when you consider both taste and quality. If you have access to a Japanese market or an Asian market, you will have some decent choices to choose from. JFC has three brands Nozomi, Tamanishiki, and Yume. They are all excellent short grained rice to work with. We personally like Matsuri Premium Rice.

You can use other rice such as Shirakiku Calrose Rice but there will be some extra work involved as I will go on to explain here.


Now the difference between American methods of cooking rice and Japanese methods vary in both the ratios of rice to water and preparation. Now growing up I was always taught to use 2 Cups Water to each Cup of Rice then add butter. This will not do! For Japanese cooking your ratio will always be one cup of water to each cup of rice.
So let's start with one cup of rice. Before you go straight to adding your one cup of water you'll need to WASH YOUR RICE! なに? Yes that's right. You'll need to wash the rice. This is very important!

To wash your rice run cold water and rinse your rice repeatedly. When you first pour water into the rice pot the water will appear cloudy. You’ll want to rinse that cloudy water and drain over and over again until the water appears clear. With good rice you can accomplish this in six or seven rinses. The colder the water is the better your rice will wash. If you are using lesser quality rice you can find your self rinsing twice as much but with hard work and determination you can still produce sticky rice.

Once your rice water is crystal clear, you can drain one last time and now add that one cup of cold water equal to the cup of rice that has been washed. Add a pinch of salt and stir it around the pot once. The salt will help prevent the rice from sticking to the pot thus eliminating the American need for using butter. This is actually healthier for you.

Now that you are ready to go turn on your stove and bring to a boil. Make sure your rice is covered and periodically stir. Once the water is nearly completely gone, turn off the heat and stir once and quickly cover. Next shake the pot from side to side for two shakes. This will help absorb any residual water. Let it stand for at least two to three minutes.

Next add Rice Vinegar. This is the most crucial ingredient! Add between half to one capful of rice vinegar according to taste then stir. This is what truly gives the sticky rice it’s flavor. You can find rice vinegar in pretty much any Asian foods section in the US or Japanese market. If you want to take one additional traditional step; use a small towel and place over the pot to go under the cover. This helps retain moisture and keeps the rice from going hard. If you have a bamboo rice pot even better!

Now if you have followed all of these easy steps,
You too will now master sushi rice!
Enjoy!

Monday, March 15, 2010

鶏串- にわとりくし Niwatori Kushi - Chicken Skewers


Konnichi-wa! Your Gaijin-Gourmet is back from another round in the dojo and back in the kitchen to bring you something simple and easy to make to suit your Japanese inspired tastes. Now with spring officially here, barbecuing season will be kicking into full swing before long. So to start spring off I thought I would give you something we were inspired to make while watching an episode of the 2004 NHK Taiga Drama Shinsengumi. Spring had hit the show and the Samurai were all enjoying teriyaki chicken skewers along the rest stops along the Old Tokaido Road. It looked so OIISHII that this modern day Bushi had to try it ourselves and offer it to you. Niwatori Kushi or teriyaki chicken on skewers as an easy dish you can make anywhere.  And when I mean anywhere I mean here in the US or in Japan with ease. As I have stated before, what I offer here is nothing original but simple easy to make Japanese inspired dishes where ingredients and ease of assembly make Japanese cooking accessible to anyone. And with that disclaimer out of the way, let's get cooking!

As with any meal found on here, you'll need a few ingredients to get started.
1/2 lb of chicken breast
1/2 Cup of Teriyaki Sauce for Marinade
1 pkg Wooden Skewers
1 pkg Aluminum Foil
1 Basting Brush

OK this might not sound like rocket science but its always good to cover the basics. Take a 1/2 lb package of chicken breasts and clean with cold water. Cut away any excess fat for preparation. You can use thigh meat but you'll spend more time trimming fat so I recommend sticking with breast meat.

Once your meat is cleaned and trimmed of fat, take your breast meat and cut in 1 1/2 to 2 inch bite size slices.


Place your chicken slices and place into a bowl or mixing container.
Pour the Teriyaki Sauce to marinate.
Refrigerate for one hour.

Easy enough so far ne?

Good! - Let's continue!


After a good hour, take out your wooden skewers and place up to four pieces of teriyaki marinated chicken on each skewer. Don't place more than four per skewer. If you have ever seen anyone eating Niwatori Kushi on an NHK Taiga Drama, you'll only see four pieces on that skewer. Remember, it's not a Shish kabob. It's Japanese!

Now if you noticed, we earlier mentioned using aluminum foil. You'll use this for your gas BBQ or Japanese Hibachi Grill. Either method of grilling will work out fine. I reccommend taking the foil and lining the edge of the grill. The reason for this is if you have ever grilled shish kabobs before it's not uncommon for the skewers to catch fire and burn away. Lining your grill with foil will help prevent that so you can cook a nice presentable Niwatori. Remember, in Japanese cooking presentation is very important. わかりますか?

Line your niwatori right up to the edge of the foil. After 15 minutes, baste with a brush additional teriyaki sauce for flavor and according to taste. We really love teriyaki so we baste this a few times before serving. Remember to baste both sides.
Cook until golden. Don't do like the Ren-Faire guys do and burn the meat. Remember, presentation!

This dish can be served with sushi rice, noodles, or our favorite Yasai-no-Fukumeni which we previously posted how to make here.  We hope you have a prosperous spring and fun おいいしい Japanese inspired cooking! Enjoy!

おいいしい!

Monday, March 1, 2010

ぎゅどん と もやし - Gyudon to Moyashi - Beef on Rice with Bean Sprouts

Konichiwa! It's the start of the Third Month of the Year of the Tiger and the Gaijin-Gourmet is back with another easy to make recipe for you to enjoy! Rice bowl dishes can make some great lunches and with some added variants can also do well for light dinners. So we thought we would try our hand at one of them that caught our eyes from NHK along with our own added touch by adding a side dish we learned from Soy Sauce Queen. In such we have combined two dishes to make one combined dish that we believe you will find as おいいしい as we did.
So here's what we made: Gyudon- which literally means Beef on Rice is something that looked easy to make. Now that the Shinkendo dojo that we train at has moved right across the street from the Nijiya Market in Little Tokyo, we couldn’t help but take advantage of special beef packages available there. Now we have used the thinly sliced beef before for other dishes such as Shabu-Shabu and other dishes, but we had not used it before but not in a rice bowl dish. Luckily, we came across a rice bowl dish on NHK’s Japanese Kitchen where we could put all these things together. So let’s get started! はじめましょ!
Here’s what you’ll need:


1 package of thinly sliced beef – This is best found in Asian Markets.

1 Cup of Cooked Rice

½ package of Bean Sprouts

1 Onion

1 Cup (or two depending on taste) of white wine.

1 Cup of Water

¾ Cup of Japanese Soy Sauce

½ Cup of Mirin

4 Tsp of Sugar

2 Tbsp Sesame Oil

I previously mentioned that the thinly sliced beef is best found in Asian Markets. If you are in Japan or near a Japanese Community. If this is not the case, You can improvise by working with Mexican Shredded Steak commonly used for my native Carne’ Asada. Once you have this little detail worked out, you’ll want to cut them in 5cm or 4 inch slices.


For these dishes, I prefer to use a white onion. Typically, you'll want to cut the top and the bottom off and remove the inner seed portion. From there make thin slices across the board. I recommend using the whole onion. Trust me, you'll thank me later!
Combine your 1 Cup of Water with a Cup of White Wine in a Wok or Skillet. Wok's work best for this. Bring the heat up until boiling point. Depending on how much beef you mat need to add another cup of Wine or Water depending on quantity and taste.  Lower the heat to medium. Add your beef and simmer until browned. You should leave it in there between five and ten minutes. Once browned, skim off any surface broth.

Once your beef is ready, add your Mirin, Soy Sauce, and Sugar. Cover it for a few minutes then add your onions into the mix and continue to simmer. Cook the onions until soft. By now your you should be getting hungry. We sure did!  

While your Beef & Onions simmer you can work on the Moyashi - Bean Sprouts. What you'll want to do is take a good handful of Bean Sprouts and put them into a smaller skillet. Use Sesame Oil and an additional 1/3 cup of Japanese Soy Sauce. Normally for cooking bean sprouts you'll want to use sugar and vinegar. If you are going to combine this with Gyudon this will over power the taste so I reccomend using only Sesame Oil and Soy Sauce to simmer for five minutes.

When everything is ready take your cooked rice and fill have a bowl, Top with the beef & Onions with a little room for your bean sprouts. Depending on your taste you can garnish with a little red sliced ginger. We didn't have any but we enjoyed this dish anyway! おいいしい!


When you have it all together you have what I call  ぎゅどん と もやし - Gyudon to Moyashi -
Beef on Rice with Bean Sprouts!
Enjoy!

Tuesday, February 2, 2010

おやこ どんぶり Oyako Donburi

Welcome back! Today I present to you an easy Donburi. If you are new to Japanese cooking, Donburi means rice bowl dish. Donburi's can be made with chicken, meats, or fish. For today I offer you an easy chicken donburi made with simple ingredients you can find pretty much anywhere. Now as we have stated in the very beginning of this blog , this is not my original creation or am I trying to deprive anyone of making money. My intention is to show you my cooking experience and how you can easily follow along to make both traditional Japanese meals or easy to make Japanese inspired meals. Wakarimasu ka? Okay then!
Now that I have my usual disclaimer out of the way let’s get cooking. よい? はじめましょお!
So let’s go over what we’ll need:

1/2 lb chicken breast - or more
4 eggs
4 dried Shitake Mushrooms – or more!
1 onion
¼ cup Water
1tsp Sugar
3tsp Mirin
4 tsp of Soy Sauce
Rice
Garnish - みつば - Optional


So the first thing you’ll want to do is unpack those dried shitake mushrooms and soak them in water. Soak them for no less than ten minutes. If there are any stems cut them off.

You’ll later slice the mushrooms in half before you are ready to use them.
Next, take your chicken breasts and slice them diagonally and then into to bite sized pieces. And then return them to the refrigerator until ready to use.
At this early stage you’ll also want to slice up your onion into thin slices. Now don’t be shy! You’ll want those onions in there. Trust me!


Depending on how much food you plan to make you may need to add an additional egg or two.
 
But if it’s just for two then stick with the program and beat four eggs together until they are ready for use.


So now if you have your chicken, mushrooms, and oinions sliced, you are almost ready to go. But first you'll need to mix your simmering sauce. I had made this Donburi before from Yukio Moriyama's book Japanese Cuisine. But as I have discovered there is always a slight deviation from her recipie when I am cooking. Sometimes, I stray from the measurements and just eyeball it to my taste. I think many people do this and in most cases it's ok. But if you are not sure of your cooking abilities then for the time being stick with the recipie.
 
So if you are ready to make your simmiring sauce, mix together 1.4 cup of water into a bowl. Do not go over a 1/4 cup as I ususally tend to do or you will end up having to drain the water midway during cooking. This can skew your results so try to avoid this. Mix your water together with the soy sauce, mirin, and no more than that tsp of sugar.
 
Next, pour your simmiring sauce into a good sized skillet and bring to a boil. Once boiling add in your chicken, onions, and mushrooms. Cook them until the chicken appears done and the onions tender.
 
This should take about 2-3 minutes.


If your chicken, onion, mushroom mix appears ready, pour the beaten eggs into the mix and cover for around one minute.
 
The optional part of the recipie calls for a garnish to be added in. The Japanese recipie uses a garnish called mitsuba but if you can not find mitsuba any regular garnish in small amounts will do. This is mostly done for presentation. This is of course entirely optional.


If you have your rice already cooked then you can serve up the contents of your skillet. Place rice into a bowl then place the chicken & egg mix over the rice. If you have any left over simmering sauce left over you can pour a small amount to sweeten your donburi. This makes for an easy meal suitable for lunch or a light dinner. Not to mention it is relatively inexpensive to make. And you know that's always a plus! So please come again! I hope you enjoy this recipie. Enjoy!
 

Omusubi Update!

Yokoso! It’s been a little over four months since I started this little cooking blog. Up until now I have had a small stream of visits here and there. But last month’s post on Omusubi evidently was a big hit. So big in less than two weeks time I have over 1000 visits even surpassing my American Mishima writing blog. Even bigger yet that I am appearing on Google's first listings for Omusubi. Well what can I say? So far so good and no complaints! Whew! I had previously mentioned that my Omusubi went over big at the Shinkendo Dojo among the Real Japanese and to my relief it was also a hit at the Buddhist Temple. Boy was I relieved! So with that I would like to take a moment out to thank everyone for visiting my little page. ども ありがとう ございます! いってらっしゃい =)